
DIY geometric statement wall
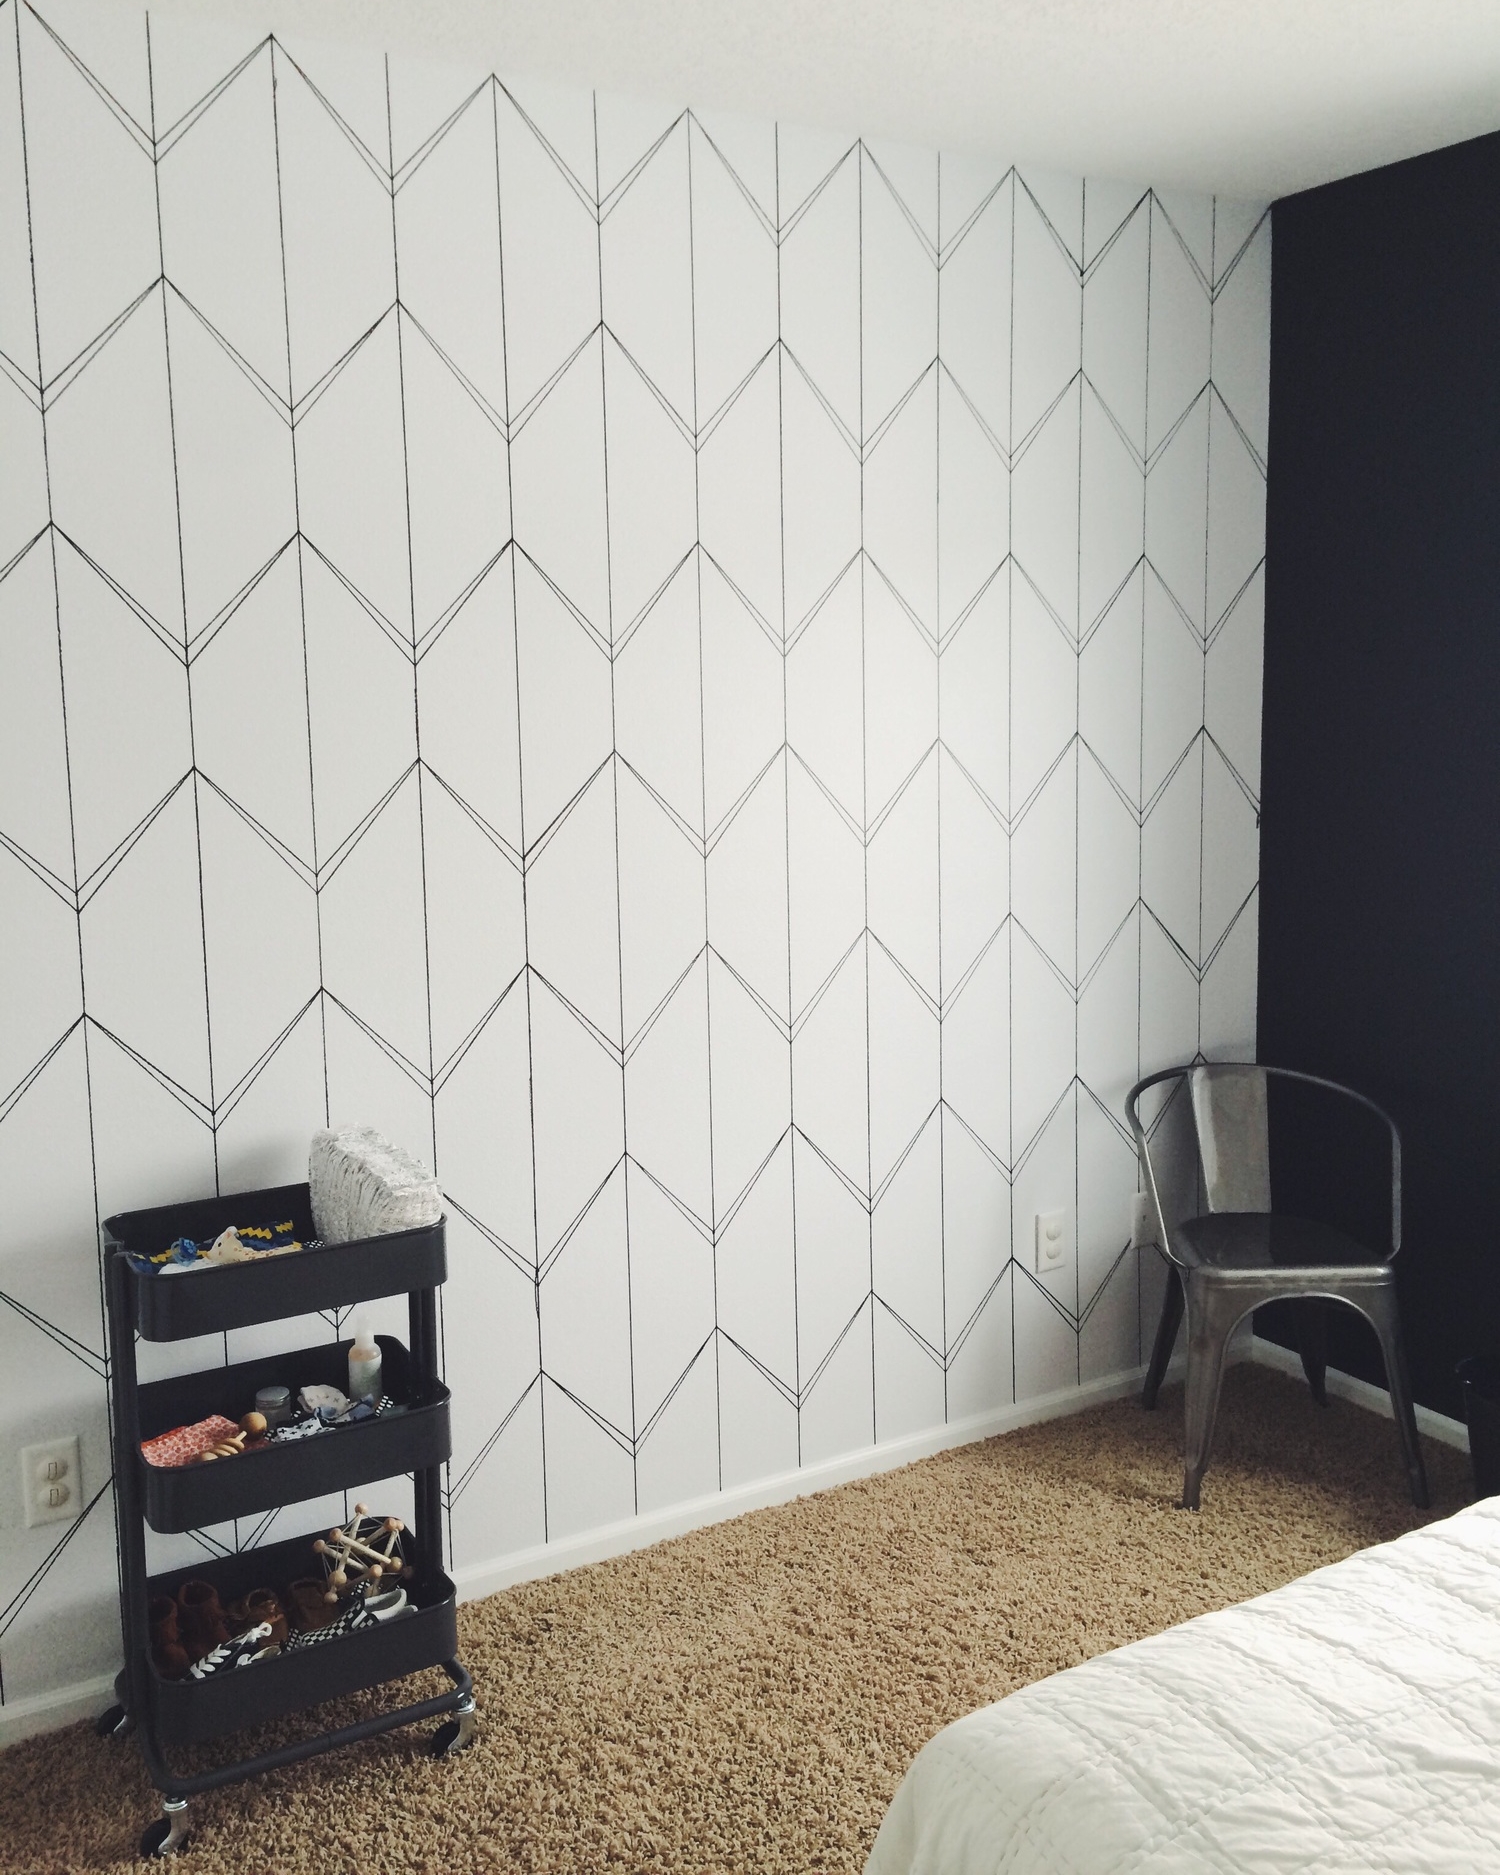
Yay! I am in love with how this nursery is turning out! This geometric statement wall was such a fun and easy project. It can't take credit for the original idea, but I do want to share my tips for anyone who's thinking of doing it.

I got all my supplies at Jo-Ann Fabric for $20.84 (I had two coupons). I couldn't find either of the things I needed at my local Michael's store. I also could not find black water-based markers, so I used oil-based. I think the water-based ones may not dry as glossy as the oil ones, but you should be able to paint over both.

Supplies
6.5" x 24.5" Fiskars acrylic ruler (originally $19.99, on sale for $11.99)
Three (3) Sharpie Paint Pens, black, medium point (regular price: $3.49 each)
Our wall was 10 feet wide by 8 feet tall. It took us 5-6 hours to complete the project, and we used three paint pens. Not necessarily because the paint ran out, but because the points gets dull. Eric drew the vertical lines and I did the angled ones.
VERY IMPORTANT NOTE: This is NOT a regular Sharpie. It is a Sharpie Paint Pen. If you use a permanent Sharpie marker, it will be very very very hard to paint over.

Vintage Revivals has a great tutorial on how to create this pattern (as well as a tutorial for a triangle pattern, which we considered). There's no stencil - you just use a large ruler to measure where your "dots" go, and then you draw lines to connect them.

I highly suggest this project, but I'd like to share a few things we discovered along the way...
The vertical lines are 6.5" apart. This was also the same width as our ruler, so after we made the first vertical line in the center of the wall, we just lined up the ruler on that line to draw the next one. If you're right-handed, it gets tricky to draw the lines to the left of center.
When you get to a corner where your walls meet, draw a vertical line even if it's not 6.5" from the previous line.
Instead of drawing dots with your paint pen, you may think about drawing lines with a pencil. They will get covered up, but sometimes I accidentally drew my dot in the wrong place or drew it too big, so it can still be seen now that we're done.
When you get to the corners near the ceiling, you will have to use the side/thin edge of the ruler to draw the line (photo below).
We messed up. A lot. Our walls have a light orange peel and sometimes the markers would just sort of jump because of the texture. I also sometimes drew my dots in the wrong places. The mistakes are obvious to us (up close), but once you step back they are not as noticeable. We are planning to touch up some of our mistakes with white paint though.
The paint dries quickly, but we did have some smears from putting our ruler on wet paint, so just be aware.
Your arms will get tired :-)

What do you think? Would you try this project?

